How to Start an Online Store
Would you look at you? Gearing up, making decisions, and taking massive action to make your entrepreneurial dreams come true. You’ve been learning how to start an online store, identifying the audience you want to serve, and choosing or creating the products you’ll offer them. Clearly, you’re not someone who’s waiting for some sort of genie to pop out of a bottle, ready to grant you three wishes. Instead, you’re doing what all great capitalists of history have done - figuring out how to solve a problem in the world, and making it easy for the people you serve to pay you very, very well for that solution.
The thing is, while Amazon presents a ready-made platform you can use to tap into the world’s biggest online shopping center, it can be a little confusing when you’re just starting out. In fact, there’s one crucial step many shop owners skip. But that won’t be you! Once you’ve read this little guide, you’ll know exactly how to become “Brand Registered” and take advantage of all the perks that come with that designation.
“What perks,” you ask?
Well, getting Brand Registered will give you…
- Far greater control over your product listings
- Confidence that your product information is accurate - so your customers get exactly what they expect
- A hedge of protection around your brand
- The ability to leverage great brand content efficiently
- Help with listing your products - and their variants - even those that don’t have a UPC or EAN
- Protection from infringement on your intellectual property and logos
- Way better customer support
While there are any number of tips, tricks, and proprietary systems that we utilize at TurnKey, being Brand Registered is something that we preach to our clients on a regular basis. There are a bunch of perks that come with registering your brand on Amazon, and you’re about to learn the steps to opening an online store that converts like crazy.
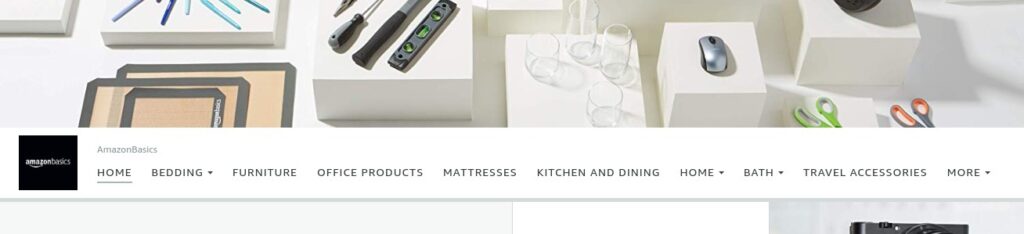
Getting into Your Amazon Storefront
Essentially, an Amazon Storefront is a mini-website that is customized to reflect your brand and display your products. Amazon shoppers can view your storefront without ever having to leave Amazon.com. Storefronts create a win-win situation for you and Amazon. Amazon gets to keep their traffic on their website and you get to display your products and brand in a way that allows customers to get a feel for your brand personality and the depth of your product catalog without the stuffy restraints of a product listing.
Assuming you are Brand Registered, you can create or edit your storefront from your Seller Central account. Simply log in, access your dashboard, hover over the “Store” tab, and select the “Manage Store” option. If you have multiple brands, you will see each one listed here. Select the “Create a Store” button if you don’t yet have a storefront or “Edit Store” if you want to make adjustments to your existing storefront.
If you are not Brand Registered, the “Manage Store” page will give you a link to “Register a Brand”. If this is you, drop everything you’re doing and get that process started today! Seriously, if you want to know how to start a successful online store, this is one task that’s too important to skip. Your long-term success on Amazon can be greatly improved by taking this small step for your business.
Now that you’ve accessed your storefront, let’s dive into the components that will make your storefront attractive to customers. This is a vital step in learning how to start a small online retail business with sales that grow week after week.
Meet Your Storefront Homepage
Throughout your storefront, you’ll have the ability to add video, images, infographics, text, add to cart options, and more. All of these additions will help customers identify with your brand and learn what you stand for. Be sure to take advantage of this increased flexibility by showing off your brand’s unique personality. You don’t just want to display your whole catalog of products. You also need to make sure your storefront mimics the feel of your website and any other client-facing deliverables you may have. Consistency is key to building strong brand recognition.
The homepage is your first opportunity to introduce yourself to your potential customers.
- Make sure that your homepage is aesthetically pleasing and uncluttered.
- Match the color scheme of your storefront to your branding.
- Include as many lifestyle images, infographics, and product images as you can without overwhelming your customers. Use this time to introduce image assets that did not make it onto your listing.
- Follow TheTurnKey Way when adding videos to your storefront2.
- If you have a smaller catalog of related products (around 1-5 SKUs), you should be able to include all of your products on your storefront’s homepage.
- If you have a larger catalog or it includes a more eclectic mix of products, use the homepage to focus on introducing customers to your brand as a whole instead of individual products.
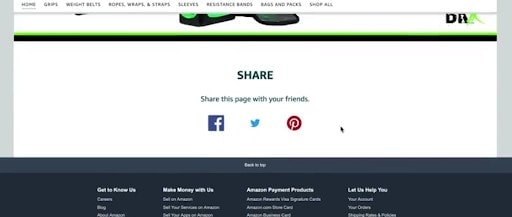
- Be sure that customers can get the word out about your amazing storefront by including a social share option at the bottom of the page.
The TurnKey Way: If you’re trying to figure out how to start an online store without inventory or you’re still in the planning stages, you should tuck this tidbit away until you have a large product catalog (10+ SKUs). At that point, be sure to include the bestselling products, and recommended products features on your homepage. This will ensure customers don’t miss what you do best!

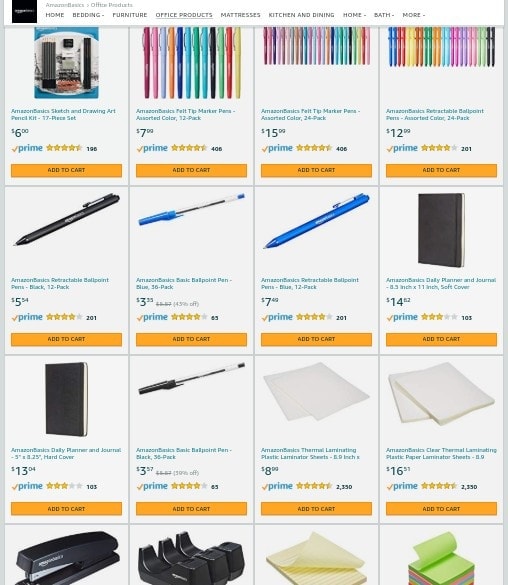
Check Out the Menu Bar
The menu bar appears at the top of each page of your storefront below your header image (Amazon refers to this as a hero image). The strategy you should employ here depends on the number of SKUs you have. If you’re just starting out and researching how to start an online store for free - or just testing the waters with a smaller selection of products, add a tab for each of your products and link to individual product pages. For larger product catalogs, group similar items into tabs and showcase these related products on pages together.
The TurnKey Way: Include a “Shop All” tab anytime you utilize the product grouping strategy. This gives your customers a place where they can browse all your products if they aren’t sure what they are looking for. This “Shop All” page also comes in handy when you are learning how to start an online shop on Facebook or to drive other external traffic to your Amazon storefront!
Build Your Pages
Your storefront pages are a great way for you to give more specifics about a product or group of products. Amazon provides a variety of templates and tiles you can use to make your page look professional and visually appealing. The way you format your pages will vary greatly depending on what sort of page you are creating:
- Single Product Pages: You can choose to format pages that focus on a single product in a number of different ways, including having them mimic an Amazon listing with the product title, images, bullet points, variations, and add to cart button. It is key to remember that you want to share as much relevant information about the product as you can without cluttering the page. Add product-specific videos, share testimonials from past customers, give useful tips and tricks about the product, and above all, let your brand’s personality shine through!
- Multiple Product Pages: When creating a page for a group of similar products, the split section is a great feature to use. While you won’t be able to dive as deep as you would into each product as you would on a single product page, you should still take time to touch on each product in the group and highlight key features and images that might appeal to customers.
- Shop All Pages: This page should have a grid of all of your products in one place. The great thing about this feature is that customers can see coupon clippings and other promotions you are offering on all of your products.
The TurnKey Way: Amazon is always adding new features to the storefront so check back often to see how you can improve your storefront. What feature are we loving lately? Interactive images! This feature allows you to click on different parts of an image and a pop-up appears. This is great for highlighting the features of your product.
Preview and Publish
Once you’ve created a storefront you can be proud of as you start an online boutique of your own, it’s time to give it one last look from the customer’s perspective and submit it for publishing. The preview option can be found in the upper right corner of the Store Editor. You’ll want to check each page of your storefront in both mobile and desktop view for the following:
- Spelling and grammar errors
- Images that are distorted or pixelated
- Videos that do not play, are hard to hear, or have poor image quality
After checking your storefront for any errors, you are ready to hit the publish button and submit your storefront to Amazon for a final review! Amazon will check your storefront to ensure it is within its terms of service. Amongst others, the most important thing Amazon checks for is compliance with their policy that no seller communications take their traffic offsite. So be sure that there are no external links or references to your product website in your storefront. Throughout this “moderation” process, you can check on the status of your storefront. The moderation statuses include:
- Not Submitted: This is your moderation status when you are still working on your storefront.
- In Progress: Once you’ve submitted your storefront to be published, this will be your moderation status.
- Approved: If Amazon okays your storefront and it goes live, this is the moderation status you’ll see
- Failed: This moderation status means there is an issue with your storefront. Amazon will email you to let you know what the issue is so you can fix it.
The TurnKey Way: When walking through the preview process, have someone who is less familiar with the storefront go through it. In addition to the items listed above, have them point out anything they don’t understand. This will help you better simulate the experience a customer landing on your page for the first time would have in your storefront. Get ahead of your customers by making sure you are answering their questions before they ask them and alleviating their concerns before they have them.
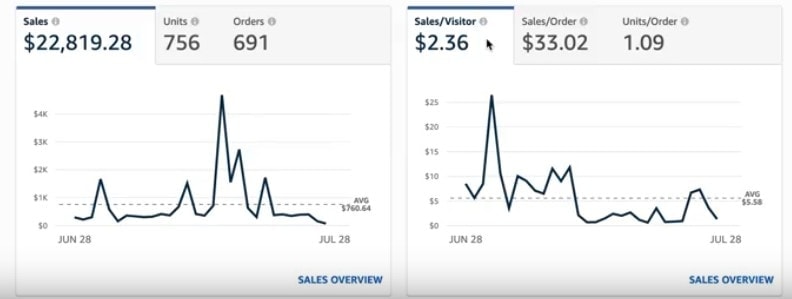
Visit Your Insights Tab Often
Congratulations! You have a live storefront on Amazon. While this is a great achievement, the process doesn’t stop there. You’ll want to regularly check the Storefront Insights tab to see how your store is performing. There are two types of reports you can run in this tab. The Store Overview report lets you know how the storefront is performing overall. While the Current Page Report allows you to view more detailed information on a page by page basis. Use the information you gather here to make purposeful optimizations to your storefront!
The TurnKey Way: Don’t let this slip through the cracks! Set a recurring task for yourself to review your storefront insights to make sure it is optimized. Just as you don’t want to set your listing on autopilot, your storefront should also be a place of constant revision and innovation!
How to Open an Online Store, Step by Step: Keys to Remember
- Your storefront should represent your brand and your product. Your color palette, images, infographics, etc. should reflect this and should look consistent with your website and branding.
- Keep your design as clean and uncluttered as possible. While you want customers to see all of your products, you do not want to overwhelm them. Use the Menu Bar as well as Individual, Group, and Shop All pages as necessary.
- Preview your storefront to make sure it looks great on mobile and desktop.
- Review the features and insights of your storefront often and make changes as necessary.
As a platform, Amazon is always looking for ways to showcase their sellers’ products and bring more traffic to the site as a whole. After all, if you are successful, so are they!
It makes sense to look before you leap into any new venture, and asking questions like, “How much does it cost to start an online store?” is a smart move. But it’s always easier to start an online clothing store - or a store that sells the products YOUR audience wants most - with a little help from some folks who’ve done it over and over and over again.
That’s why we wanted to be sure you got some thorough guidance on this crucial step. By taking advantage of the Brand Registry tools at your disposal, such as the Amazon Storefront, and using these resources effectively, you can give your business a leg up over your competitors!
This article was contributed by Jeff Lieber and his team from TurnKey Product Management, an Amazon consulting company. With over 12 years of Amazon experience, over 150K products sold, and over 8-figures in revenue made for our clients in the past year alone, we are uniquely positioned to help brands scale their sales on Amazon through a variety of services: full service management, Amazon PPC management, 1-on-1 coaching, standard operating procedures, online trainings and more.